LAFARGE WESTERN CANADA - INSTRUCTIONS FOR ACCESSING ORIENTATIONS
Announcing a new method for Site Orientations
We are pleased to announce that we are now using an online training platform (Learning Management System - LMS) for Contractor/Hauler/Visitor Orientations.
To complete the training, you will need either:
- Access to a computer that’s connected to the Internet and that has Internet Explorer or Google Chrome installed, or
- Access to a mobile device that’s connected to the Internet

On Computer
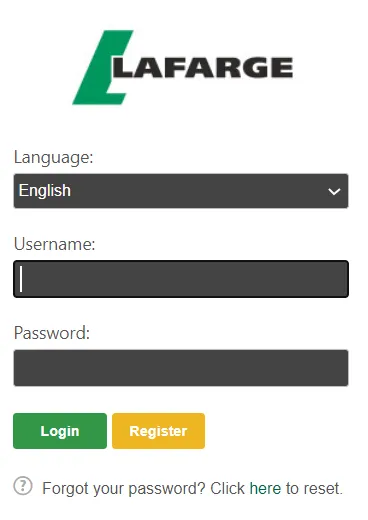
1. Launch Internet Explorer or Google Chrome
2. Enter this web address in the web address field: https://lafargeholcim-wcan.contractortrainingonline.com/LHWCAN
3. The Contractor LMS Landing Page will appear
4. Click the Register button
On Mobile Device

1. Click on the link or scan the QR Code
https://lafargeholcim-wcan.contractortrainingonline.com/LHWCAN
2. The Contractor LMS Landing Page will appear
3. Click the Register button
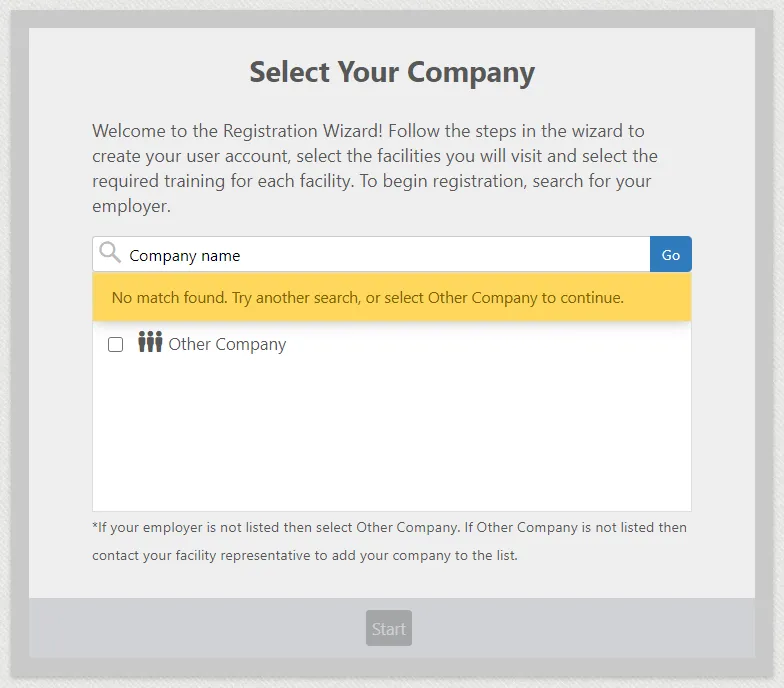
1. Type in all or part of your employer’s company name in the search field
2. Click the Go button
3. Check the checkbox to the left of your company name
Note: If your company is not listed, select the checkbox to the left of “Other”.
4. Click the Start button at the bottom of the screen
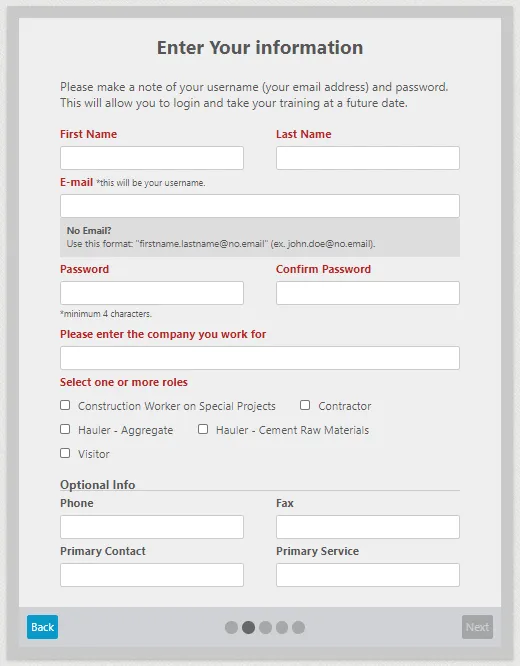
Note: Red Fields = Required Entry Fields
Black Fields = Optional Entry Fields
- Enter your first name
- Enter your last name
- Enter a valid email address – this will become your user name
Notes: No email? Enter firstname.lastname@noemail.com
- Create and confirm your password.
Note: The password must be at least 4 digits and is not case-sensitive.
- If you selected “Other” as you company name you will need to enter your company name
- Select one or more of the Roles.
Note: This will affect which training you are assigned.
Your site contact will be able to clarify which role you should select.
You can change this after the registration process.
Click the Next button
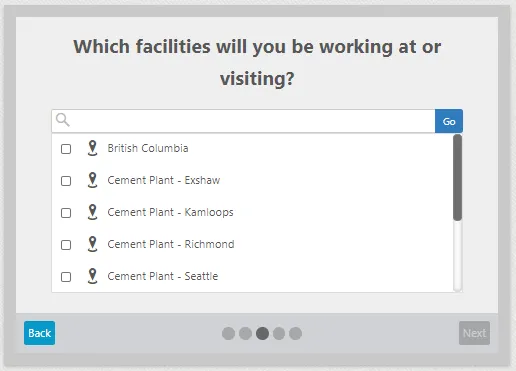
- Select one or more facilities
Note: This will affect which training you are assigned.
Your site contact will be able to clarify which facility you should select.
You can change this after the registration process.
Click the Next button
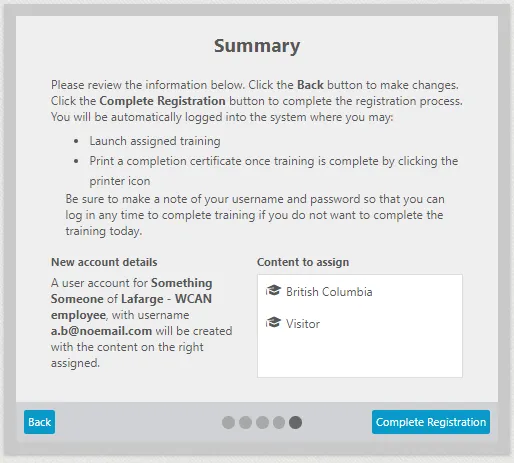
- Review the information on the screen and click the Back button to make changes
- Click the Complete Registration button to complete the registration process
- If a valid email address was provided, an email confirmation will be sent with the web address for the Learning Management System and username (email address) you provided.
Note: Store this in a place where you can access it along with making a note of the password you created if you need to login at a future date.
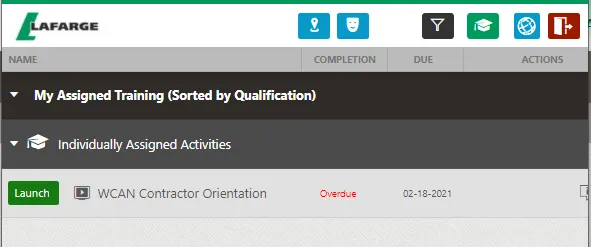
- You are now logged in to the LMS
- Click the Launch button to the left to launch and complete any of the orientations selected
- When training is completed, the completion status will change to “Complete”
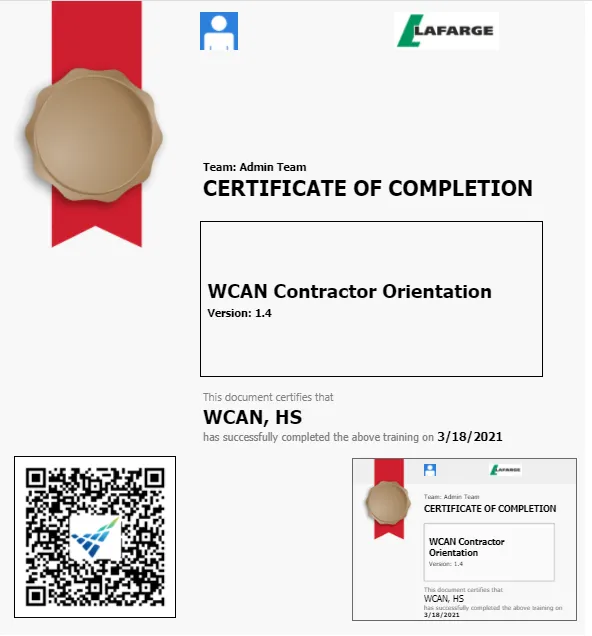
- Click the Printer Icon that appears on the right side of the screen in the Actions column
- Bring this certificate with you as proof of completed training
Note: Instead of printing the certificate you can take a screenshot or take a picture using your mobile device.
The QR code on the certificate allows us to quickly pull up all of your training completion records.
The online training is valid for one year (365 days) after the date on which it is completed. Before your completed training expires, the system will send an email notifying you that your training will soon expire and you must repeat it again.

Additional Features
If you selected the incorrect facility during registration or you start working at an additional facility,
- Click the Update Facilities button located at the top of the screen
- Change your facility selection(s) using the checkboxes
- Click the Select button
Note: The system takes time to refresh after you change your selection.
- The training requirements will be updated.


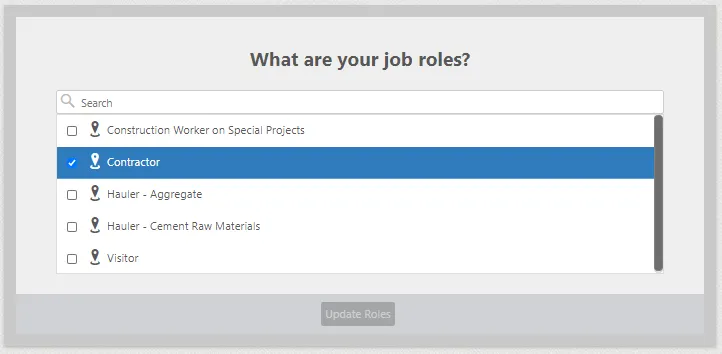
If you selected the incorrect role during registration or you have been asked to change your role (ie working on a special project).
- Click the Update Roles button located at the top of the screen
- Change your role selection(s) using the checkboxes
- Click the Select button
Note: The system takes time to refresh after you change your selection.
- The training requirements will be updated.
Contact us Today !


